2D Overset Plug Tutorial
This tutorial will cover the basics of setting up and running the fluid problem of a cavitating flow over a plug in a pipe with a moving plug.
The files that are needed to run this case can be extracted from a gzipped archive located here. The files will extract into a directory structure that mirrors this case’s location in the tutorials repository.
Geometry and Boundary Conditions
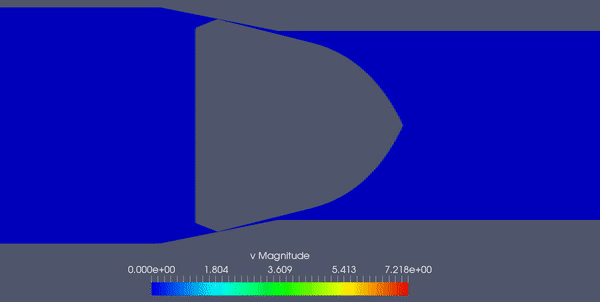
The geometry and boundary conditions for this case are shown below. In this case a flow of liquid nitrogen enters the domain from the left boundary and flows to the right through a restriction caused by a plug. The plug is pulled out and the liquid vaporizes as it traverses the flow restriction into the lower pressure downstream region of the pipe.

Geometry and boundary conditions for the overset plug tutorial.
Grid
A mixed triangular/quadrilateral cell grid was first generated using SolidMesh. This was then extruded by SolidMesh into a single-cell thick grid in the z-direction. The grid is comprised of 377,000 prismatic/hexahedral cells. Particular emphasis during the grid-generation phase was placed on proper resolution of the wall boundary in the region where the flow would pass through the restriction. A few images of select regions of the grid are shown below.

A view of the background grid within the pipe.

A view of the plug grid.
Because this is an overset grid case, there are two separate grids that need to be independently generated and then combined using a Loci grid tool. In this case, we generate a pipe grid, which serves as the background grid, and a plug grid, which is the moving grid that will be overset onto the background grid.
In this case, the plug was drawn in a coordinate system such that is located at the exact location where it is 100% open. For this case, we will move the
plug to a 97% closed position to illustrate the Loci tools that are used to move the plug. The plug at the 100% open position is 31.75mm upstream of the
flow restriction, and for this case, the plug file is called plug.vog. To move it to the 97% closed position we use the following commands.
vogmerge -g plug.vog -xshift 30.7975e-3 -o plug_shifted.vog
This tells the Loci vogmerge tool to shift the plug grid by 30.7975mm in the x-direction. The -g option specifies the input grid file,
the -xshift option specifies the amount to shift the grid in the x-direction in meters, and the -o option specifies the output grid file name.
This generates a new vog file called plug_shifted.vog, which is the plug that is in the correct position and ready to be merged with the
background grid. The background grid is called pipe.vog. The two grids are merged using the following command.
vogmerge -g pipe.vog -tag pipe -g plug_shifted.vog -tag plug -o case.vog
This command tells the Loci vogmerge tool to combine the two grids. The -g option specifies an input grid file, which in this case the first input
that we are giving to the utility is the pipe.vog file. The -tag option specifies the tag that will be used to identify the grid that was just specified
with the -g option. The second input grid is the plug_shifted.vog file, and the tag for this grid is plug. The output file is called case.vog and is
specified with the -o option.
Run Control File Setup
The run control file for the simulation is shown below.
In the following, we briefly discuss some of the key choices made in setting the run control file parameters for this case.
In the
grid_file_infovariable, we have placed thetwoDimensionsoption, because we are solving a 2-D flow on the grid. This option causes Stream to zero out the velocity field in the z-coordinate direction for all computations. When using this option, it is important that the grid be oriented such that the extruded direction is the z-dimension.The
liquid_modelandvapor_modelvariables specify data files to use for the liquid and vapor phase thermophysical properties. To generate these file please visit our documentation .An important aspect of the
oversetmodule is thecomponentGeometryspecification. This defines a region that encompasses any voids in the overset mesh so that the module can properly identify the cells of the background mesh that are inside the overset mesh and remove them in a process called hole-cutting. The specification does not need to be exact, but it would encompass the volume of the what could be consiered the solid region of the overset mesh. In this example, the plug mesh is a mesh around a solid shape, and it is this interior solid shape that we need to describe a boundiing geometry for using thecomponentGeometryvariable.We use a
revolutiongeometry for the plug, which simply specifies two points given byp1andp2, and a set ofoffsets, which are normalized lengths between 0 and 1 that represent locations along the line connecting pointsp1andp2. The final specification is theradius, which is a set of radii at the specified offsets.Because this overset case is also moving, we need to also specify how the plug moves in time. This is done using the
componentMotionvariable. The background grid of the pipe is given thestationaryvalue, and the plug grid is given theprescribedvalue, which means that the motion of the mesh that is tagged asplugwill be taken from an external input file. This file is namedmotion_plug.datwith the name of the volume tag specified in the file name itself in the formmotion_<tag>.dat. The file contains the following information:The first line is the number of interpolants that are used to describe the motion of the plug in time. The following lines contain the time in seconds, the position in meters(x,y,z), and four components of a normalized quaternion that describes the rotation of the plug about the preceeding position.
Running the Simulation
In the tutorial main directory are three files that are required to run the case.
case.vog: the grid
case.vars: the run control file
NITROGEN.liq: the NIST database file for liquid nitrogen, created by the cavitation tool provided with Stream
NITROGEN.vap: the NIST database file for nitrogen vapor, created by the cavitation tool
NITROGEN.sat: the NIST database file for nitrogen saturation, created by the cavitation tool
motion_plug.dat: the file that contains a description of the motion of the plug mesh in time
For this case, the grid has around 377,000 cells. Stream has parallel efficiency down to 5,000 cells per processor, so you will
want to run using less than 75 processes for the value passed to the -np argument in the mpirun command shown below. Using fewer
processes is fine and will only result in an increased time for the solution to be generated. Execute the code using the following command.
mpirun -np 75 <path_to_stream_exec> --scheduleoutput -q solution case >& run.log_0 &
The case will run until the number of timesteps specified in the case.vars file is reached. Restart checkpoint solutions will be
written to the restart/ directory at the number of timesteps specified in the case.vars file for the restart_freq variable.
Results
The extract program is the utility that is used to view the results of a simulation. For this case we view the simulation at time step 1000. In the
run directory extract the solution using: extract -vtk case 1000 P v vapor_y . This will generate a solution directory with files in the
Paraview VTK format which can be opened by Paraview. The case name is case and the time step is 1000, and the variables to extract
are the pressure(P), velocity(v), and vapor mass fraction(vapor_y). Below is a contour plot of the magnitude of the vapor mass fraction field, which
was created using Paraview.

Contour plot of the magnitude of the vapor_y mass fraction field.